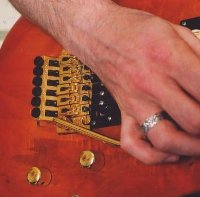
| If you play an electric guitar, then it may be equipped with what is traditionally known as a 'tremolo arm', but is often referred to nowadays as a 'trem' or 'whammy bar'. This is a lever arm attached to the bridge which allows the bridge to be tilted forwards/backwards during playing, causing the string tension to be dropped/raised. |  |
A tremolo-equipped bridge can be set up in one of two ways. One way is to have the bridge flat to the guitar body - by pushing down on the arm the pitch of the strings can be lowered.
An alternative way of setting up the trem is a 'floating' set-up. This is a little harder to achieve as the string tensions have to balance the tension of the springs in the tremolo mechanism. This set-up is, however, more flexible as it allows the arm to be pulled upwards to increase string tension/pitch as well as lowering pitch by pushing the arm down.
Personally, I far prefer a floating bridge set-up, although it does take a little getting used to. In particluar, if you are used to resting your hand on the bridge then with a floating set-up you may well find that the pressure of your hand can be enough to push the bridge back slightly, making the guitar go out-of-tune for nornal playing.
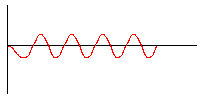
There are a number of effects that you can get by using the trem. Some are more tasteful than others, whereas some are a bit more gimmicky. The one thing that they have in common is that they're all equally difficult to describe in writing. What I've done for this tutorial is to provide a brief textual description of how to play each example, together with a simple diagram. Each example is accompanied by an audio clip - hopefully the combination of words, picture and sound will be enough to guide you throught the playing side of things. As with all of the material that's covered on this website, if you get stuck with something then you're quite welcome to get in touch with me to ask any specific questions.
In the notation below, the 'neutral' position of the bar is shown by a horizontal black line. Movement of the bar by hand is shown in using a red line (above the line denoting the bar pulled up, below denoting pushed down). A grey line is used to show movement of the bar under its own momentum (e.g. allowing it to return to 'neutral').
To hear an audio version of any of the examples just click on the link underneath the diagram.
A combination of the previous two examples. This time you are pushing the bar down and then pulling it upwards to achieve a vibrato effect which goes both above and below the 'pivot' note. |
 |
Dive bomb effects are often used in rock and metal, . most often using a high-pitched note or harmonic. The effect is fairly straight forward to play - after striking the note, push the arm down fairly fast and fairly hard. This effect also works well when trilling (hammering-on/pulling-off repeatedly between two notes) as in the second audio example. Dive bomb effects with the trem are best employed with a modern system with a 'knife edge' bridge as this increases the intensity of the effect. |
 |
Once your comfortable with the basic effects described here, experiment with them and look for ways to incorporate them into your everyday playing. Intelligent/tasteful use of the trem can be a great way of adding character. Have fun.
How useful did you find this tutorial?